Quickstart
Here is how to fiddle with gmic-py in five minutes.
gmic-py is a cross-platform Python binding for the G’MIC C++ library.
G’MIC is nowadays mostly used for its image processing domain-specific language (DSL), or through its plug-ins for graphical software.
In our case, only the language is available, but it is very powerful though!
Using gmic-py always boils down to five steps:
install the module
import it
(instantiate a G’MIC language interpreter)
evaluate a G’MIC expression against G’MIC samples or your own images
retrieve your output images
1. Install gmic-py
This works on Linux or Mac OS for now. You need no compiler, just Python >= 3.6.
In your favorite shell, run:
pip install gmic
This will install the G’MIC pre-compiled module for Python:
Collecting gmic
  Downloading gmic-2.9.0-cp36-cp36m-manylinux2014_x86_64.whl (8.8 MB)
     |████████████████████████████████| 8.8 MB 6.8 MB/s
Installing collected packages: gmic
Successfully installed gmic-2.9.0
2. Run a simple G’MIC effect and view it
You are now ready to work, open a Python 3 terminal or edit your own .py file and type in the following:
import gmic
gmic.run("sp earth blur 4")
What that does is:
import the
gmicPython modulecreate a default G’MIC language interpreter and give it an expression to evaluate:
sp earthwill load a sample image from G’MIC library, namedearthblur 4will apply ablureffect to the image(s) before, here with a force of 4.
The G’MIC language’s commands are all listed in its reference documentation on gmic.eu. Here is for the ``blur` command itself. <https://gmic.eu/reference.shtml#blur>`_ If you are on Linux (sorry, not Mac OS), you will see a window popping up with the following image:

sp earth blur 4
If you would like to use your own file instead, just write its path first instead of sp earth:
gmic.run("/home/me/myimage.jpg blur 4")
3. Save your result to a file
Whether you are on Linux or MacOS you can also save your image with the output G’MIC command.
import gmic
gmic.run("sp earth blur 4 output myblurredearth.png") # will save in the current working directory
4. Dealing with GmicImage and GmicImage lists
Now you may want to use and analyse your result images without having to save them first!
For this, pass in as a second parameter a standard Python list, which will be filled with the result.
You can then use this image list as input or output for other commands.
The G’MIC Python binding works on image lists in place similarly to the C++ version. Those lists of images, named gmic_list in C++, are plain-oldlists the Python world.
G’MIC will not rewrite GmicImage data in place, instead it replaces GmicImage by new ones inside image lists, or appends new images.
import gmic
image_results = [] # This is my image set that G'MIC can read and write in place. Its contents can grow and reduce.
gmic.run("sp earth blur 4", image_results) # will save in the current working directory
print(image_results)
# [<gmic.GmicImage object at 0x7f6b8f27e3f0 with _data address at 0x1fdfe00, w=500 h=500 d=1 s=3 shared=0>]
gmic.run("display", image_results) # will show the image a window (for Linux only)
gmic.run("print", image_results) # will print image statistics
# [gmic]-1./ Print image [0] = '[unnamed]'.
# [0] = '[unnamed]':
#   size = (500,500,1,3) [2929 Kio of floats].
#   data = (2.59494e-26,3.91551e-26,5.90707e-26,8.91042e-26,1.34385e-25,2.02649e-25,3.05511e-25,4.6054e-25,6.94078e-25,1.04589e-24,1.57568e-24,2.3734e-24,(...),5.74726e-24,3.81723e-24,2.53479e-24,1.68282e-24,1.117e-24,7.41318e-25,4.91866e-25,3.26308e-25,2.16433e-25,1.43531e-25,9.51711e-26,6.30933e-26).
#   min = 6.66209e-27, max = 243.369, mean = 88.0979, std = 63.7667, coords_min = (0,499,0,0), coords_max = (84,345,0,2).

sp earth blur 4
gmic.run("fx_bokeh 3,8,0,30,8,4,0.3,0.2,210,210,80,160,0.7,30,20,20,1,2,170,130,20,110,0.15,0", image_results)
gmic.run("display", image_results) # will show the image with bokeh effect applied a window
gmic.run("print", image_results) # will print image statistics
# [gmic]-1./ Print image [0] = '[unnamed]'.
# [0] = '[unnamed]':
#   size = (500,500,1,4) [3906 Kio of floats].
#   data = (32.1635,38.7346,46.0117,53.8523,62.053,70.3621,78.5205,86.3153,93.5843,100.211,106.123,111.297,(...),255,255,255,255,255,255,255,255,255,255,255,255).
#   min = 0, max = 255, mean = 150.29, std = 95.1853, coords_min = (84,0,0,0), coords_max = (0,0,0,3).

sp earth blur 4 fx_bokeh 3,8,0,30,8,4,0.3,0.2,210,210,80,160,0.7,30,20,20,1,2,170,130,20,110,0.15,0
5. Working with the Numpy support
A chapter of this documentation is dedicated to the Numpy support of the G’MIC Python version. Head over to the Numpy support page for details. For now here is a foretaste of it showcasing one-direction conversion from G’MIC to Numpy.
You can input and output 1D to 3D matrices between G’MIC and Numpy. Note that gmic-py supports data input/output with not only Numpy support, but also PIL support and Scikit-Image support.
You must install the numpy module yourself, G’MIC will detect and import it from there, leveraging some of its functions.
Data-scientists should keep in mind that G’MIC works internally with float32 pixel values, arranged in a non-interleaved way (eg. RRR,GGG,BBB), with matrices whose shape is always 4D and prints as (width, height, depth, spectrum) where spectrum is the number of channels (ie. per-pixel values).
import numpy
from matplotlib import pyplot as plt
import gmic
images = []
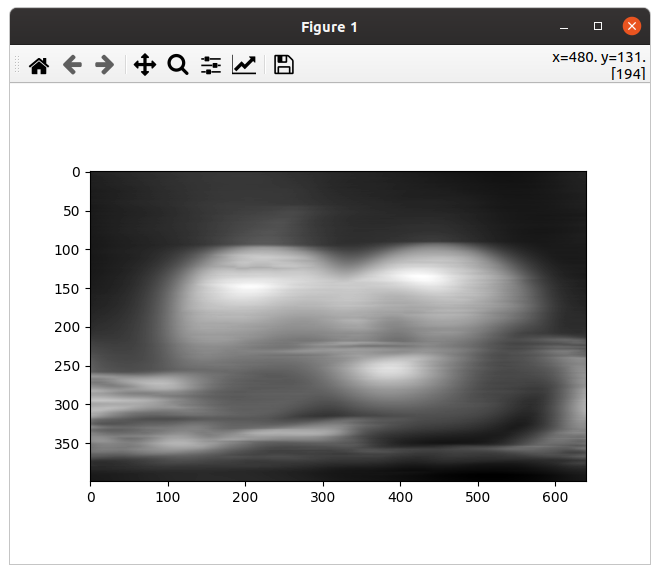
gmic.run("sp apples blur_x 30", images) # Handy way to generate an image into file
sp apples blur_x 30
Now let us try a display from Numpy using Matplotlib
numpy_im = images[0].to_numpy() # deinterleaves, keeps G'MIC w,h,d,s shape
print(numpy_im).shape # (400, 640, 1, 3)

# prepare a Matplotlib display with the dimensions=1 hidden to have a proper 2D image
# by default, Matplotlib does not like float with a range in 0-1, so we normalize values by dividing by 255
numpy_for_plt = numpy_im.squeeze()/255

# time for displaying
plt.imshow(numpy_for_plt)
plt.show() # See rotated apples
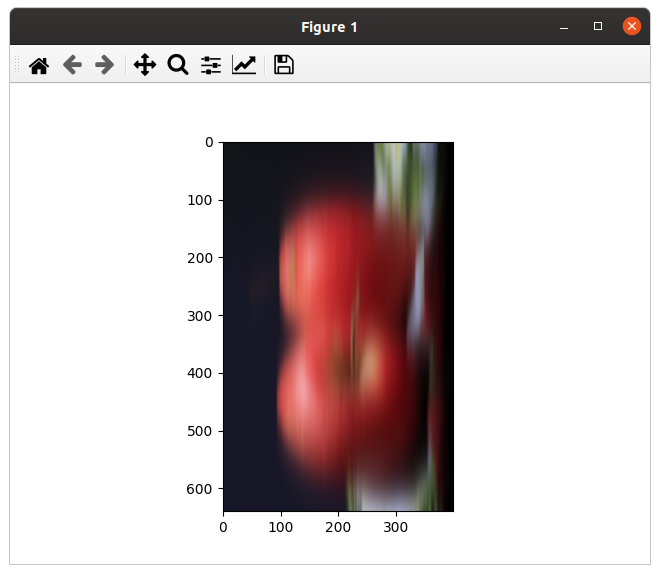
Now let us fix those apples orientation and use numpy for greyscale filtering
# Pure-numpy greyscaling per https://stackoverflow.com/a/51571053/420684
numpy_for_plt = numpy.dot(numpy_for_plt[... , :3] , [0.299 , 0.587, 0.114])
numpy_for_plt.transpose((1,0,2)) # flipping x and y axes

# Time for redisplaying
plt.imshow(numpy_for_plt, plt.get_cmap('gray'))
plt.show()
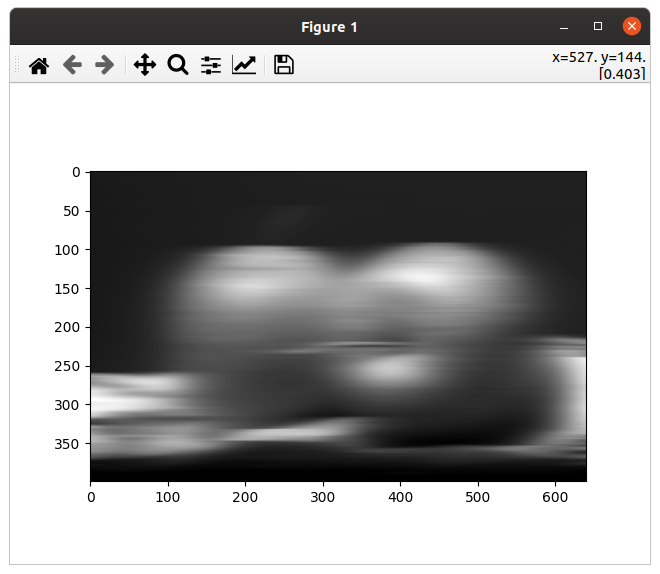
To sum up, here was different fast way to work from G’MIC, with more work on the G’MIC side
import numpy
from matplotlib import pyplot as plt
import gmic

images = []
# The gmic.eu website shows various types of B&W: https://gmic.eu/gallery/blackandwhite.shtml
gmic.run("sp apples blur_x 30 fx_freaky_bw 90,20,0,0,0,0", images) # horizontal blur+special black&white
numpy_im = images[0].to_numpy_helper(interleave=True,permute="yxzc", squeeze_shape=True, astype=numpy.uint8)
plt.imshow(numpy_im, plt.get_cmap('gray'))
plt.show()